Monday, March 31, 2014

Deep Waters Mystery Component Reveal...

Today is the REVEAL of the Mystery Component for the Deep Waters Challenge.  Up until now, only the participants of the challenge were privy to this information!

The Mystery Component is a porcelain pendant made by me.  It is glazed in a matte Velour glaze in Dazzling Blue and tumbled to bring out the details and give the piece a satin-silky feel.

To find out more about the Deep Waters Challenge, CLICK HERE.  And keep your eyes peeled for the Blog Hop Reveal where participants of the challenge will share their creations!  The Blog Hop is scheduled for Thursday, April 24th!

Sunday, March 30, 2014

Bead and Craft Bloggers...

A Bead A Day
Wishing for spring brings on a little bit of inspiration involving spring flowers!

The Writing and Art of Andrew Thornton
There's a NEW metal clay in town!  White CopprClay!  Andrew shares his experiences working with the latest innovation in this versatile medium.

Crochet Kit Giveaway
Enter to win a super, uber, ad-or-able Wizard of Oz crochet kit!

Resin Crafts Blog
This is part one of the three-part post which focuses on containing resin in a flat wire wall.

Carmi's Art/Life World
I wanted to share this special blog hop I coordinated with 12 different designers.  All their projects are so unique and different!  They received Neo Chain from Dazzle-it to play with.

Eggs in Nest Beaded Charm Bracelet
Three blue-speckled eggs nestled in a wire-wrapped charm make a great focal charm.  This bracelet features three nests.  Click for directions.  There are matching earrings as well.

Snap out of it, Jean!  There's beading to be done!
Jean reviewed 1000 BEADS put together by juror, Kristina Logan.  She is also hosting a GIVEAWAY!  See Jean's blog!

Mixed Media Artist
The weaving technique that Cyndi used in an art quilt was successful enough for her to try it again.. and see if she can get it right this time!

Beading Arts
Cyndi hasn't played much with chain maille, but after making these easy earrings, she might have to change her ways!  Here's the tutorial!

Thursday, March 27, 2014

30 Words Thursday...

Poking up from the ground, tufts of yellow and green amongst the brown. Crocus flowers, a welcome sight: Heralds of things to come.  Spring awakens and drawing closer and near.

Wednesday, March 26, 2014

A Goldfinch for A Good Friend...

A friend of mine did a good deed.  I don't always get a chance to reward random acts of kindness.  Time seems to be in short supply these days.  But this time, I wanted to do more than just send a note.  I took a few moments each night and carved a block of polymer clay.  Once it was cured and I had tooled it with a Speedball Linoleum Cutter and then painted it.  I knew that my friend liked birds, so I picked a goldfinch.  I love the happy little coat of yellow feathers and how they turn upside-down to eat their thistle.  Seeing them flutter around always brings a smile to my face and I wanted to share that with my friend.

Sunday, March 23, 2014

Bead and Craft Bloggers...

A Bead A Day
Special occasion jewelry can also provide comfort.  Lisa created a colorful and sparkly bracelet to focus on while flying!

Art Bead Scene
Celebrate Art Bead Scene's 7th Birthday with are massive giveaway!

The Writing and Art of Andrew Thornton
To celebrate National Craft Month, Fusion Beads is hosting a month-long challenge!  Get an overview of what Andrew has made for the first fifteen days!  (And play along if you're game!)

Resin Crafts Blog
With a week of posts featuring Nunn Design's new components, it was hard to choose a favorite, but this pearl filled bezel does stand out!

Carmi's Art/Life World
With my collection of vintage linens finally sorted and displayed, I made some time to make a new necklace featuring the embroidery from one tablecloth.

Felt Peep Bunnies
Cherie shares some Peep bunnies she made out of felt.

Preserving Memories: Creating "This is Cartagena" Digital Scrapbook Paper
The instant Eileen saw this graffitied wall in the old city of Cartagena, she said to her husband, "I could make a scrapbook paper of that!"  Then she snapped away.

A Creative Dream
June is celebrating the arrival of spring by giving away a bouquet of flowers!

Get Hopping!
The Crafty Princess participated in a fun Dazzle-It blog hop.  See what she cooked up with the jewelry supplies they sent her.

Mixed Media Artist
Here's a quick, easy, and useful project you can do with your scrap papers... scrap magnets!

Beading Arts
Cyndi has had the chance to play with some new products from Fire Mountain Gems, and she came up with a crazy little pair of brightly colored mixed media earrings for the spring!

Snap out of it, Jean!  There's beading to be done!
Jean writes about the 8th Bead Soup Blog Party hosted by Lori Anderson and what she received from her super, wonderful partner, Jen Purple!  WOW!

Saturday, March 22, 2014

NEW White Copper Coin Pendants Now Listed...

I just wrote about my experience working with the NEW White CopprClay.  You can see that post by CLICKING HERE.  I have also just listed four designs in this new silvery metal.  I have made coin pendants in the dragon, octopus/Kraken, jackalope, and crowned floral skull designs.  If you are interested in checking them out in the online shop, CLICK HERE.  I love that I am able to offer the look of fine silver, but at a fraction of the price!

Friday, March 21, 2014

Fusion Beads 30 Day Bead Challenge: Day 21...

The challenge for Day 21 in the Fusion Beads 30 Day Bead Challenge was to work with leather cuffs and straps.

For this challenge, I used turquoise leather from the store.  We carry a selection of colorful leather cording.  I cut it in lengths that are approximately the same size.  (It's good if it's not exactly perfect.)  I then glued and crimped down the ends of the leather in a ribbon end.  To dress it up, I used some vintage glass pearls and put a really long extender chain with a pearl dangle.

This is a great present idea if you're not sure how big to make the bracelet.  No one likes to make alterations if it's too long or too short.  This design is completely adjustable.

For variations, knot the leather or string beads on before closing it up.  I'm really smitten with this design and think it looks very contemporary and fresh.

If you're interested in checking out the full calendar of prompts and creative exercises, CLICK HERE.

Explorations with WHITE CopprClay...

The other day, I was thinking about ordering some fine silver PMC (Precious Metal Clay).  I adore fine silver clay.  I still remember the excitement of when it first came out and how we sat around the kitchen table making things with wild abandon and unbridled zeal.  After doing lost wax casting, it seemed so much easier and less involved.  And even though powder metallurgy isn't new (it's actually quite ancient), this medium was shiny with new possibilities.

I had heard there was a sale going on and I wanted to take advantage of it.  When I looked it up, the 50 gram packets of fine silver PMC were over $100 each!  I felt a little lightheaded and decided to wait for another day.  Who knows?  I might get lucky and win the lotto!

How was I going to make things that looked like the things I used to make (and not break the bank)?  I thought about Gilder's Paste, silver leaf, acrylic paints, heat-seat inks, alcohol inks... and more.  Sure, they were silver and some of them were even passable.  But it wasn't the same.  And then, suddenly, as if an answer to a silent prayer, an email arrived in my inbox announcing the NEW WHITE CopprClay!

I've had a lot of success with the BronzClay and CopprClay developed by an American company, Metal Adventures.  So, I jumped on the opportunity to work with this new product.  I placed my order and started Googling it to see who had been working with it and what they were making.  And that's when I came across some rather unflattering comments about the nickel content and that it may not be in compliance with the EU regulations.  Some of the comments were heated and took on a frenzied tone warning against the product and how it was poison.  I was reminded of the BIG drama surrounding PMC in classrooms and my stomach fell.

Here's my opinion:  Use safety measures that you feel comfortable with and use common sense.  If you don't eat, snort, or ingest (any) metal clay in powder, liquid, or clay form, you should be fine.  Wash your hands often or wear gloves.  Don't stand over your kilns during burn out phases and use appropriate ventilation.  Wear a dust mask during the carbon stage.  If you're pregnant or thinking about getting pregnant, you might want to postpone your metal clay fun until afterwards.  And if you're allergic to nickel, then by all means, skip to another medium.  For more health and safety tips and to check out the MSDS, CLICK HERE.  And when you're selling your products, use full disclosure, so that your customers can make fully informed decisions.

So, before anyone goes and lights the torches, remember to be respectful of everyone's right to choose what materials they want to work with and if it's not your cup of tea, skip the tea party.  Don't go raining down hate and negativity, just because it's not for you.

And... without further ado, here are my experiments:

The first stage of working with the clay, was pretty similar to working with regular CopprClay.  I found the clay body to be smooth, thoroughly mixed and it didn't dry out super fast.  It also wasn't super sticky right out of the package.  Sometimes when I'm working with BronzClay, I like to leave new packages open for a little bit to dry out a touch to make it less gummy to work with.  When dry, the WHITE CopprClay has a nice flexibility and isn't super brittle.


With WHITE CopprClay, you have to do the firing in two stages.  For the first firing, you have to spread things out on a stainless steel mesh rack and ramp the kiln at 500 degrees Fahrenheit to 600 degrees and hold it for 10 minutes.  I'm a set it and forget it type of guy and for that reason, the first firing is kind of a pain and not the most convenient, but I feel as though if you want a quality piece, it's not too bad to add the extra step.  

During this step, I dropped a few pieces when I was taking them out of the kiln and one of them chipped.  Even though they're easily handled, they're not sintered yet and you still have to baby them a little.
  
The second phase is familiar territory for those already versed in firing the regular CopprClay.  You load everything up in a stainless steel box in a carbon environment and fire away.  The only difference is that the firing temperature is a little higher.

I did have a few anomalies after this stage.  One piece was deeply cracked and another had a fine spider web of cracks on the back.  My guess for first one is that it might have been one of the pieces that I dropped after phase one and thought was all right, but really wasn't.  With the other one, it might have been too thick and needed more room around it during the firing.  I'm not sure.  But 2 out of 55 is pretty good!

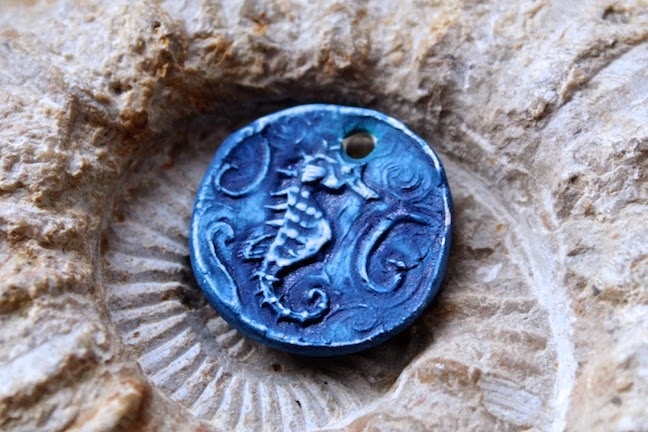
Here are two examples of what the pieces can look like after the second firing without defects.  The metal is super lightweight and depending on where it is in the box can either be powdery white or rainbowy.

At this stage, I hammered out any pieces that had curled during the drying and firing process.  The metal was solid and fully sintered.  Nothing shattered and it seemed as though the metal was fairly strong.

This is the first batch after tumbling for a few hours with steel shot, liquid dishwashing detergent, and water.  The metal shined right up and have a lovely finish.  For brighter silver shine, I would probably go back and tumble again with a liquid burnishing compound.  

While the WHITE CopprClay was silver in color, there were definitely differences with the look and feel between the WHITE CopprClay and fine silver PMC.  The WHITE CopprClay is a tad more dull and has more of a gray cast to the metal. It also feels lighter.

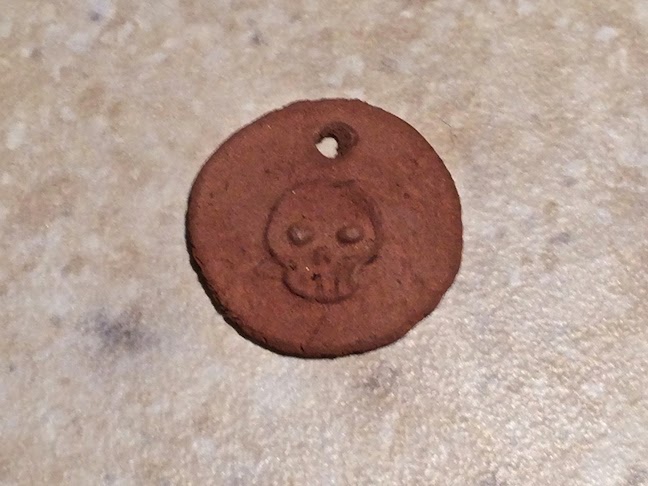
Here are the four designs that I pressed out.  (I carved the molds a few nights ago by flashlight when the power went out!)  I made the octopus/Kraken, the floral crowned skull, the dragon and the jackalope.

I'm really happy with the end result and think that it's worth investigating further.  I want to play around with some of the finishing touches, like Renaissance Wax or Pledge.  Maybe even some Gilder's Paste for pops of color.  I also want to experiment with different spray finishes to provide a barrier for people with skin reactions.  I know that I can use a crystal clear Krylon, but sometimes that can look a little plastic-like.  It's an exciting time!  It's almost as exciting as those first few times that we worked with the original metal clay formula.  WHITE CopprClay is full of possibilities!

Thursday, March 20, 2014

Fusion Beads 30 Day Bead Challenge: Day 20...

If you're just popping in, each day there's a new creative exercise in this month-long challenge celebrating National Craft Month.  For Day 20, we were asked to make a memory wire bracelet.  Last week, for Day 12, I created a set of stackable bracelets and I used memory wire for those.  So this felt like familiar territory.  I even had a little extra memory wire leftover from that challenge.

We have a Treasure Box at the shop and I put all kinds of random beads in it.  I sometimes order "floor sweepings" or assorted beads by the pound, but I also throw in things like broken strands and unclaimed leftover beads from projects worked on in the store.  I try to throw in a few beads that are on the more expensive side to really make a treasure hunt.  You can fill a plastic baggie up as full as you can for $5.  (Of course, you have to follow the rules!)

I decided that I was going to make something with some Treasure Box beads.  I strung up the beads without a pattern or theme in mind.  I just wanted to embrace the randomness.  I think this is a fun memory wire bracelet, perfect for stacking with other bracelets!

Want to see the complete calendar for the challenge?  CLICK HERE to take a look.

30 Words Thursday...

On a table in the studio, the Frozen Charlottes and antique penny dolls, with their chipped fingers and cracked faces, lay in a dish: old white porcelain and milky glass.

Wednesday, March 19, 2014

Fusion Beads 30 Day Bead Challenge: Day 19...

On the 19th Day in the month-long challenge hosted by Fusion Beads, we were asked to work with gemstones.  I loved working on this prompt, because I love the beauty of gemstones.  Whether they rough, faceted, or tumbled, I have a weak spot for the lovely treasures of the earth.

I had a strand of morganite in my stash that I wanted to use.  It's not a super common stone.  It's a type of beryl that's usually rosy in color, but can also have blues, greens, oranges, yellows.  It's kind of like if tourmaline and kunzite had a baby.

I thought that the pale pastel colors would be ideal for a spring-themed bracelet.  So I embellished a length of hammered sterling silver chain with wire-wrapped dangles strung up with the morganite rounds.  For an added little touch, I used balled headpins to repeat the shape of the beads and jazz it up a little.  To tie it all together, I used a sterling silver cherry blossom clasp from my family at Green Girl Studios.

I think the bracelet turned out really nice.  It has a lot of great movement and I'm a smitten kitten with those morganite beads!

You can still join in on fun!  There's still about two weeks worth of challenges.  Not to mention that you can back track and participate at your leisure.  CLICK HERE for the entire calendar.

Roll With It...

The other night, I had pressed out some coin pendants in what I thought was a leftover package of CopprClay.  As it turns out, it was half a pack of Fast Fire BronzClay.  When I dug through the carbon, the results were a little discouraging.  Sometimes when you have a picture in your mind of how they should be, anything less is a disappointment.

Even though they were crusty and had lots of porosity, surprisingly, they were fully sintered.  A few of them had blistered from the high heat, but most of them were solid.

The high heat had distorted the images and made them nearly unrecognizable.  The details were lost.  Since the designs couldn't be salvaged, I decided to try and save what I could of the raw material.

I cleaned them up and hammered out the coins.  Hammering them helped to further remove any elements of the design that remained, but weren't very clear.  It also acted as a vetting process, just in case any of the pieces weren't "fully cooked" in the center.  Another added bonus was that I was work-hardening the pieces as I went, giving the pieces added strength.

Once I hammered them out, I tumbled them with steel shot.  I let the tumbler run over night.  When I pulled them out of the barrel, they were too shiny, so I passed them through a MAP gas flame a little to give them a little bit of color.

I had posted my findings on Facebook and a few friends suggested that I pair the coins with Roman glass.  I just so happened to have a couple of strands and decided to give a try.  I drilled holes in this piece and wired on the iridescent glass.  Having them stacked (with a metal border) adds a little security to the fragile pieces of ancient glass.  I love the look of Roman glass, but am always so worried that it'll break or chip.  So, when I planned out this design, I made sure that the glass was used decoratively and not structurally.  

I like the end result.  It looks like a talisman made up of an ancient coin and a shard from a lost civilization.  It has a very rustic, unearthed vibe.   

I was playing around with some of the pieces and thought that I would try stamping them with metal stamps from ImpressArt.  I used the Bridgette font and stamped the word, "love" with a little heart design.  I used the ball peen end of the hammer to give the pendant a little extra bit of that dimpled, hammered texture.  It's sweet and dainty.  I paired it with a strand of tiny garnet rounds, strung up on Red Coral colored flexible beading wire from Soft Flex Company.  The beading wire adds a tiny pop of color in-between beads and it deepens the ruby-red of the translucent garnets.

Sometimes things don't work out the way you plan, but if you roll with it, something new and surprising can emerge and it's wonderful!  Sometimes the happy little accidents are just as satisfying and rewarding as meticulously planned and executed pieces.

Soldering with a Micro-Torch Ultimate Collection...

I'm going to make a confession.  I'm not the best at soldering.  Up until recently, I never took a class or even opened a book about the subject.  I had this mentality that I could just smear some solder on and wave the torch around and magically it would just work.  Boy, was I wrong!  Talk about a hot mess... literally!  Things had bubbled, blistered, burnt and pulled apart.  My pieces were perfect examples of what not to do and the bad experience intimidated me for years.

And then... I picked up Kate Richbourg's book, "Simple Soldering".  She breaks it down, step-by-step and reveals the mysteries of how to solder in an easy, understandable way.  She explains the fundamentals in great detail and eases those torch anxieties.

Interweave has put together another fantastic collection!  This time it's all about soldering and Kate's book is one of the great resources in this collection.  The collection is called, Soldering with a Micro-Torch Ultimate Collection.  They've selected titles from talented artists like Denise Peck and Casie Donien, featuring hours of content and dozens of how-to projects.

The coolest thing about this collection is that it available for instant download.  That means that you don't have to stalk your postal carrier and lurk in the shadows, ready to pounce when there's movement by the mailbox.  You can get started soon after you claim your collection.  And with their other offers, this one has a price that can't be beat!  For a limited time, everything is available for $59.99!  This set has a retail value of $96.74!  AWESOME savings!  To find out more about the collection, CLICK HERE!

Tuesday, March 18, 2014

Fusion Beads 30 Day Bead Challenge: Day 18...

The prompt for Day 18 of the Fusion Beads 30 Day Bead Challenge was to break out the Vintaj and form some filigree!

We had a Canadian jade cabochon in the shop and it fit perfectly in the design of the filigree.  I decided to form the filigree around the cabochon to create the focal.  To me, most filigree has such a vintage feel to it.  (Probably because a lot of the designs come from vintage stampings.)  With that in mind, I used vintage Japanese glass beads in a striking green to compliment the focal.  The greens are perfect for this time of year.  I think the finished piece has an heirloom quality to it and I like it.

It's not to late to get in on the action!  CLICK HERE to check out the full calendar of prompts!

Monday, March 17, 2014

Fusion Beads 30 Day Bead Challenge: Day 17...

The prompt for Day 17 of the Fusion Beads 30 Day Bead Challenge was to learn a new bead weaving technique.  It just so happens that earlier this month, I got an email from Beading Daily featuring a new-to-me stitch called the Chenille Stitch.  The article was written by the very talented Jean Campbell and in the post, she actually writes about how it was new to her during a teaching engagement at Arrowmont School of Arts and Crafts.  CLICK HERE to see the post and how-to instructions.

The stitch is a hybrid of herringbone and netting and creates a beaded rope.  On my phone, all I could see were the photos (sans diagrams) and the written instructions.  Try as I might, it just wasn't clicking.  I couldn't get the beads to lay right and it seemed too loose.  Obviously I was doing something wrong.

I was actually working on the project while I was at the shop and in my haste to pack a customer's order, I accidentally tucked it in with their purchase... needle and all!  Luckily they found it (and returned it) and no one got jabbed.  I did take it as a sign to set it aside and approach it at a later time with fresh eyes.

Even though I had thrown in the towel and waved the white flag, I got curious about where in the instructions I had went wrong.  My piece and the piece in the picture did not look alike!  When I looked up the post on my computer, the diagrams showed up.  And that's when the lightbulb blinked on!  Aha!  I got it!  Sometimes it just takes one drawing to make everything clear.  Even though it's exactly the same material, shifting the presentation ever so slightly allowed me to process the information.

With my newfound understanding, I decided to whip up a project.  As with some of my other challenge pieces, I intended a much larger finished project, but due to time constraints, had to think outside of the box to speed things up.  With that said, what started out as the beginning of a bracelet, morphed into a beaded ring.  To form the Chenille stitched portion, I used size 11/o seed beads in turquoise-lined, light topaz-colored seed beads with a luster finish and matte antique rose-colored seed beads with a gold luster.  The cool thing about this ring is that the colors look completely different under different kinds of light.  Sometimes the turquoise is more prominent, and sometimes the topaz is brought out more.

To turn the beaded rope segment into a ring, I strung it on a piece of Soft Flex beading wire strung with size 11/o seed beads.  (I tried to string it without the core of seed beads, but it was too loose feeling and I felt like I was crushing the tube when I put it on.)  I also added a little bling with a Swarovski crystal double AB finish bicone, flanked by two African copper spacer rings.

I think it turned out pretty awesome considering that I had almost given up on the Chenille stitch!  Now I'm dreaming up all kinds of creations!

If you're interested in participating in the challenge, CLICK HERE for the full calendar.

Charmed and Lucky Mixed-Media Jewelry Kit...

Happy St. Patrick's Day!  To celebrate the holiday, get crafty!  Interweave has put together another great kit.  This one is called the Charmed and Lucky Mixed-Media Jewelry Kit.  It's loaded with all kinds of mixed-media delights!

The kit includes Susan Lenart Kazmer's new DVD on altering metal surfaces (this alone is worth it!), an eBook from Kristen Robinson, the Lucky U Charm Necklace Instructions from Jenn Mason, Stencil Girl Custom Stencils, and a ICE Resin Kit that's packed with everything you need to get started with working with resin.  It has a syringe of easy-to-use (and measure) ICE resin, NEW ICED Enamels Medium, Relique powder, ribbon, findings, mixing sticks and cups, paint brushes, and brass hearts.

The thing that I love about resin is that it empowers the artist to preserve, manipulate, and embellish surfaces for both jewelry and mixed-media applications.  You can capture treasured ephemeral and freeze it in time.  You can also add color and texture to drab components AND best of all, you can completely customize your creation!  This is a great kit for getting started with resin and learning about different surface treatments.

To find out more about the kit, CLICK HERE.  It's available for a limited time and at a GREAT price!  Normally priced at $79.44, it is now available for $49.99.  But don't delay, this offer is only on the table for a few days.

Sunday, March 16, 2014

Bead and Craft Bloggers...

Art Bead Scene
Check out Heather's fun tutorial using Aria Design Studio's beautiful, hand-dyed Shibori ribbon!

A Bead A Day
Lisa's sharing memories of her last day at Beadland Headquarters in Florida a.k.a Cousin Corporation.

Resin Crafts Blog
A special post about using original ephemera in high end bezels.

Card Making Tutorial: "Just a Note"
This "Just a Note" card is made using a base of 12 X 12 card stock.  Since one sheet yields two cards, you might as well make two at once and always have a spare on hand.

Beading Arts
Soutache braid trim mixed with bead embroidery... what a nice combo!

Mixed Media Artist
Cyndi shows you how to finish up a quilt with a nice wrap and tuck edging!

Snap out of it, Jean!  There's beading to be done!
Jean reviewed Melinda Barta's book, "Mastering Herringbone Stitch: The Complete Guide" and is hosting a giveaway of this really great book this week on her blog!  Yay!

Patch It Up
Fabric hoarders and scrappers will find this new book from Lark interesting: Pretty Little Patchwork.

Fusion Beads 30 Day Bead Challenge: Day 16...

To celebrate the 16th Day of National Craft Month, the prompt for the Fusion Beads 30 Day Bead Challenge was to create a wrap bracelet.

I've made these type of bracelets in the past, but it has been awhile.  I had to play around a bit before things started coming back to me.  For this bracelet, I wanted to use a NEW fine pewter, arrow button from my family at Green Girl Studios.  It's perfect for a button closure.  For the rest of the bracelet, I wanted a fresh, springy palette.  So, I went with a pale, minty green leather cord, matte antique rose seed beads with a gold luster, and white pearl Tila beads with an AB finish.  The Japanese seed beads and leather are from the shop.  I didn't want to hide the stitches and wanted to incorporate them as a design element, so I used a smoke-colored braided micro-monofiliment.

Once the technique came back, I could have easily made this several times longer, but I've been super busy and didn't have time for too big of a project.  So I made the wrap bracelet go once around.  

Someone recently asked me when I had time to participate in this month-long challenge.  And truthfully, I don't have time, but it is such a wonderful creative exercise that I've made time.  Sometimes it's only a few minutes here and there, but I've found that the process has been very rewarding.  For some of the more complicated projects, I try to start them a few days in advance and that helps me keep on track.  To view the entire calendar, CLICK HERE.

Saturday, March 15, 2014

Fusion Beads 30 Day Bead Challenge: Halfway Mark...

It's hard to believe that the Fusion Beads 30 Day Bead Challenge is halfway over!  This series of creative exercises to celebrate National Craft Month has been really fun and kicked my creativity into overdrive!

Here's a recap of my participation for the first half of this month-long challenge!  To find out more about how I addressed each of the prompts, click on the day and it'll take you to that day's post.


It's not too late to jump in!  And remember, this is a self-directed challenge, so you can skip around and select the prompts that appeal to you most!  You don't have to move in a linear fashion.  I personally like the total immersion process, tackling projects day by day... it's sort of like beading boot camp.  It's a little bit trickier, but it forces you to plan ahead and adjust ideas to make them more realistic and doable.  CLICK HERE for the full calendar!  And if you're playing along, I'd love to see what you're making!  If you have a moment, comment on this post with links to some of your favorite creations made for this challenge!

Book Club Reminder...

March is halfway over and I wanted to remind folks that it's not too late to participate in the Inspired by Reading Book Club!  The book selection for March is "An Irish Country Doctor" by Patrick Taylor.  It's a charming tale of a quaint Irish village called Ballybucklebo and a new doctor who has come to town.  It's a book filled with lots of quirky characters and is an easy and enjoyable read!  The book is also perfect for this time of year!  Once you read the book, you create something inspired by what you read.  It can be anything.  We've had participants make all kinds of stuff; everything from jewelry, to bedazzled shoes, and fabric appliqués, to stamped cards!  There's no limit to what you can make.  For locals, we have an in-person get together, where we talk about the book and usually share a bite to eat.  Then we have an online reveal, where participants can share their work.  To find out more about the group, CLICK HERE to check out the Facebook page.  CLICK HERE to check out the Pinterest board, where we've shared our creations and supplemental inspiration.

Fusion Beads 30 Day Bead Challenge: Day 15...

The prompt for Day 15 was to create something with your favorite bead mix.  I was digging through my boxes and found a mix I made a few months ago inspired by Van Gogh's Iris painting.  It is composed of size 8/o Japanese seed beads in bright yellows, springy greens, shocking blues, and peaceful purples, with a hint of copper and brown.  I decided to give it a go and make something with it.  CLICK HERE to check out the Iris Garden mix.


I did not know what I was going to make.  I just got my needle and thread out and started working.  I started out with some RAW (Right Angle Weave), but it was taking too long to make much progress, so I switched to some peyote stitch.  I was going to do a bracelet with different segments of various stitches, but I was playing around with the piece I completed and folded it over.  It fit together into a tube and I thought... hey, why not?  So it transformed into a slider tube.  I added a little bit of brick stitch to the edges, so that it has a cleaner edge.  I slipped it on a thick leather cord and called it a day!

To find out the full calendar of prompts, CLICK HERE!  If you can't do the whole month, pick one or two of your favorites and give yourself a goal to work on.  I've found this challenge to be really inspirational and highly motivational!

Friday, March 14, 2014

Designing by Flashlight...

Sometimes when I get on a creative roll, it's hard to stop.  I couldn't sleep and ended up sculpting all night.  Even when the power went out (in hopefully the last winter storm of the year), I grabbed my flashlight and kept on working.

Once I've finished the molds, I press out prototypes in polymer clay.  These help me refine the designs and if need be, carve the mold again and do a second take.  Some of these are destined to be pressed out in metal clay or porcelain and turned into pendants.  Keep your eyes peeled for what's to come!

Fusion Beads 30 Day Bead Challenge: Day 14...

The celebration of National Craft Month continues!  The challenge for Day 14 of the Fusion Beads 30 Day Bead Challenge was to create a jewelry inspiration board on Pinterest.

Off all the prompts, this was perhaps the easiest!  Why?  Because I already have a jewelry inspiration board.  I love Pinterest.  It's a form of visual hoarding that doesn't take up any room and is highly addictive.  I love scrolling through the images and absorbing different ideas and exploring different aesthetics that I like, find intriguing, or think is just bizarre (in a fascinating way).  CLICK HERE to check out my Jewelry Inspiration Board.

We have half a month left of the daily challenges!  It's not too late to participate!  You can always go back and check out all the previous prompts and look ahead to the future ones.  CLICK HERE to see the full spread of creative exercises.

Thursday, March 13, 2014

Handcrafted Jewelry Premium Collection...

One of my favorite magazines from Interweave Press is Handcrafted Jewelry (and not just because I've been featured in it).  I love that it is packed with useful information and is loaded with tons of ideas.   The magazine encourages readers to customize, create, and explore their individuality.


Not only is it great for jewelry designers looking to expand their repertoires, but the techniques can be applied in mixed media artwork and other crafts.

Interweave has made it easier than ever to get started making handcrafted jewelry!  They've assembled a kit featuring each issue of Handcrafted Jewelry AND heat-set Vintaj Patinas and an assortment of Vintaj metal components.  Plus, the kit includes designer metal stamps from ImpressArt!  It has a retail value of over $100!  For a limited time only, they're offering everything for $59.99 (while supplies last)!  It's a steal!  CLICK HERE to check it out and claim your Handcrafted Jewelry Premium Collection.

Fusion Beads 30 Day Bead Challenge: Day 13...

Bling was the central theme of Day 13's challenge in the Fusion Beads 30 Day Bead Challenge.  The prompt was to create some jewelry featuring Swarovski crystal bicones.

For this creative exercise, I decided to use four different colors of Swarovski crystal 4mm bicones:  Mint Alabaster, White Opal, Rosewater Opal, and Caribbean Blue Opal.  I used Right Angle Weave to create the four-sided, beaded cylinders.  I reinforced the stitches with extra Fireline.  Then I strung one Caribbean blue bicone, the beaded column, and another Caribbean blue bicone onto a balled headpin and created a wire-wrapped dangle that I attached to a sky-blue niobium earwire.  The effect is a pair of very "blingy" earrings!

Want to find out what's up next in the Fusion Beads 30 Day Bead Challenge?  CLICK HERE for the entire calendar.

30 Words Thursday...

Rushing waters, rising fast.  Melting snow and shrinking ice.  Yesterday's white blossom thawing, eagerly forgotten and quickly replaced by hurrying and frothing.  The once quiet creek now rumbles and roars!